

What Buyers Regret Missing Before Approving Hard Enamel Pins for Production
Most reprint requests we see on Hard Enamel Pins don't come from bad artwork. They come from a proof that got a quick glance and a rushed "looks good, go ahead." By the time 1,000 units land at the warehouse, the metal borders look thinner than expected, one Pantone shade reads warmer than the brand guide, or the pin backs feel loose on a sample jacket. None of that is fixable after casting. This is why proof review deserves the same attention as the design brief itself — because once molds are cut and plating starts, corrections mean a new production cycle, not a quick edit.
Below is what a real pre-production check should cover, plus the mistakes that cause the most rework requests from purchasing teams sourcing pins for events, uniforms, or retail drops.
Common Mistakes That Trigger Reprints
Before getting into the checklist, it helps to know what actually goes wrong on the factory floor. These are the recurring issues that show up in proof disputes:
- Line thickness collapsed in casting. Artwork with hairline details under 0.4mm often fills in during the die-casting stage, turning fine text into a blob.
- Enamel bleeding across metal borders. When cell walls are too thin, hard enamel color can seep into the next section during the firing process.
- Pantone shifted after plating. Gold or nickel plating changes how a color reads under different lighting — a color that matched on screen may look off once cast.
- Backing type mismatched to use case. Butterfly clutches work for jackets but fail on heavy uniforms; magnetic backs are wrong for anything worn near tools or machinery.
- No physical or digital sample sign-off before bulk run. Approving from a flat digital mockup alone skips the step where plating tone and enamel depth are actually visible.
Every one of these is preventable at the proof stage, not the delivery stage.
The Pre-Production Approval Checklist
This is the core of what should happen before any bulk order for Hard Enamel Pins gets a green light. We built it as a set of direct questions purchasing teams should be asking their supplier — with honest answers about where limitations exist.
Does the line thickness hold up in casting?
Answer: Any line under 0.4mm risks filling in during metal casting, especially on small pins under 1 inch. If your logo has fine script or thin serif fonts, ask for a bold-line alternative version at the proof stage. This does not apply if your pin is 1.5 inches or larger — thinner detail holds up better on bigger surfaces.
Are metal borders consistent in width?
Answer: Metal borders should be at least 0.3mm wide and even across the design. Uneven borders are one of the top causes of enamel bleed during the firing stage. If a design has borders that taper from thick to thin in one continuous line, flag it — this is a common oversight that only shows up once the mold is cut.
Do the Pantone colors match after plating?
Answer: Colors should be confirmed against a physical or digital sample after the plating tone is applied, not against a flat screen mockup. Gold plating warms colors; nickel plating cools them. A supplier offering photo or digital sample confirmation before production — which we build into every order — gives you a chance to catch this before casting starts, not after.
Is the plating type specified, not assumed?
Answer: Gold, nickel, black nickel, copper, and dual-plated finishes all behave differently under light and wear. If the RFQ doesn't specify plating, the factory will default to whatever matches similar past orders — which may not match your brand's finish. State the plating explicitly on the purchase order.
Is the backing placement marked for wearability?
Answer: Backing type and placement should be marked on the proof, not decided at packing. Butterfly clutches suit lapels and jackets. Rubber backings suit lanyards. Magnetic backs suit fabric that shouldn't be pierced, such as delicate uniforms — but they are not recommended for outdoor or safety gear, since magnets can detach under movement.
| Checklist Item | What to Confirm | When It Doesn't Apply |
|---|---|---|
| Line thickness | Minimum 0.4mm on fine text/script | Pins 1.5" or larger with simpler artwork |
| Metal borders | Minimum 0.3mm, consistent width | Single-color designs with no cell separation |
| Pantone matching | Confirmed post-plating, not pre-plating | Designs using only raw metal, no enamel fill |
| Plating type | Specified in writing on the PO | Repeat orders matching a prior approved batch |
| Backing placement | Marked on proof, matched to end use | Collector pins not meant to be worn |
Line Thickness and Metal Borders: A Side-by-Side Look
Line thickness and border width are the two specs most likely to get skipped in a rushed proof approval, so they deserve a direct comparison. Here's how different thickness choices play out once the pin leaves the mold:
| Line/Border Width | Result in Production | Best Use Case |
|---|---|---|
| Under 0.3mm | High risk of filling in or breaking during casting | Avoid for enamel pins; acceptable for laser engraving only |
| 0.3mm – 0.4mm | Workable but tight — needs proof confirmation each time | Small logo pins (under 1 inch) with simple shapes |
| 0.4mm – 0.6mm | Standard safe range for hard enamel | Most corporate, event, and custom souvenir lapel pins |
| 0.6mm+ | Very stable, holds detail even at small sizes | Text-heavy designs, multi-color logos |
If your design falls under 0.3mm anywhere, request a revised proof before approval rather than hoping the factory adjusts it silently. Some do without telling you, which changes your logo's proportions without your sign-off.
A Real Scenario: Catching a Border Problem Before Casting
A sports league client sent artwork for a dual-tone championship pin — gold and navy, with a thin red outline separating the two colors. On the flat digital file, the red line measured 0.25mm. At proof stage, we flagged it: at that width, red enamel would likely bleed into the navy section during firing, especially on a 1-inch pin. The fix was simple — thickening the border to 0.4mm and adjusting the outer pin edge slightly to keep the design balanced. That one proof correction avoided a full reprint of 500 units. This mirrors the kind of dual-tone work we handled for a Canada esports tournament pin, where gold plating and clean color separation were the entire point of the design.
Buyer's Decision Checklist Before Sending a Purchase Order
- Have you confirmed line thickness against the 0.4mm minimum for fine detail?
- Are metal borders even and specified in millimeters, not "thin" or "thick"?
- Has the Pantone match been approved on a post-plating sample, not a flat mockup?
- Is the plating type written into the PO, not left to assumption?
- Is backing placement marked and matched to how the pin will actually be worn?
- Have you requested a photo or digital sample confirmation before bulk production starts?
If any answer is no, hold the PO until it's resolved. A one-day delay for revised proofs is far cheaper than a bulk reprint.
What Happens If a Defect Slips Through Anyway
Even with a careful proof, defects happen — a batch with slight color drift, a backing that loosens after a few washes. This is where your supplier's post-production policy matters. Our standard terms include free reprints for color mismatches, proportional replacement for confirmed defects, and a 5-day turnaround for re-stocking or repair. Every bulk order also ships with 100 bonus pieces, which covers minor loss or damage without triggering a claims process. None of this replaces a solid proof check — it's a backstop, not a substitute.
Sizing Up Material and Backing Choices
Hard enamel differs from soft enamel mainly in surface finish — hard enamel is polished flat after firing, giving it a smooth, glass-like surface, while soft enamel keeps the raised texture of the metal lines. If your design has fine gradients or photo-like detail, an offset printed pins approach may hold more detail than enamel fill can. For collector-grade pieces with deep relief, a 3d cast lapel pins option skips enamel color entirely in favor of sculpted metal, similar to the antique bronze relief work produced for a Tokyo museum exhibition piece.
Backing choice should follow use case, not habit:
- Butterfly clutch: standard for lapels, jackets, low-movement wear.
- Rubber clutch: better grip for lanyards and frequent handling.
- Magnetic backing: good for delicate fabric, not recommended for active wear or safety gear.
- Safety pin backing: useful for temporary event badges, less durable for repeat use.
Cost and Timeline Context for Proof Corrections
Catching an issue at proof stage typically adds 1-2 days to the schedule for a revised digital or physical sample. Missing it and discovering the problem after bulk casting means restarting the production cycle — for reference, standard bulk production runs 8-9 days once artwork is locked, plus shipping. A revised proof is a rounding error against that timeline; a full reprint is not.
For labels or hybrid merchandise programs running alongside a pin order, similar proofing discipline applies — color drift and substrate mismatch are the label-world equivalent of enamel bleed. Buyers combining pins with custom labels printed in bulk for a product launch should request substrate samples the same way they request pin proofs.
Before sending your final purchase order, request a physical or digital proof that specifically calls out line thickness, border width, Pantone match post-plating, plating type, and backing placement. If your supplier can't confirm all five in writing, ask them to before production starts — it costs nothing and it's the single best safeguard against a reprint.
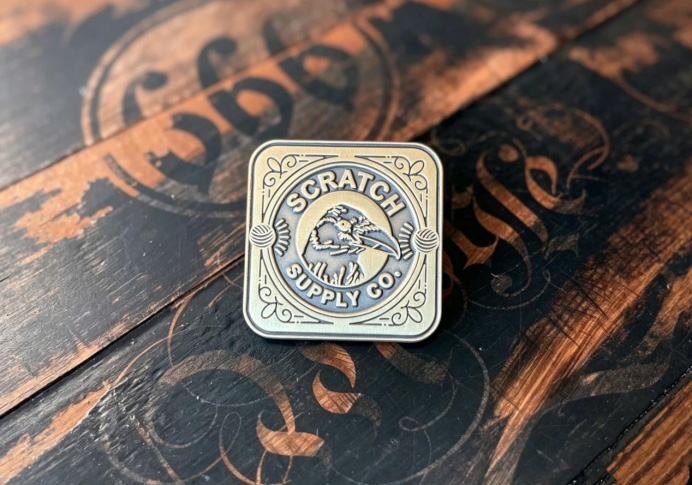
If you have artwork ready, send it over for a proof review — we'll flag any line thickness, border, or color issues before quoting bulk production.