

Lower Your Custom Jewelry Label Costs With Strategic Size Planning
The most common mistake I see growing jewelry brands make isn't in their designs—it's in their label sourcing. They order a unique label size for every earring card, necklace box, and shipping mailer. While this seems precise, it fragments your order volume, eliminates bulk pricing benefits, and quietly drives up your per-unit cost. Before you place your next order for Custom Jewelry Labels, understand that a small investment in strategic size planning can yield significant long-term savings without compromising your brand's premium feel.
Failing to consolidate sizes means you're paying for multiple unique die-cutting tools, separate press setups, and smaller material runs. Each of these carries a fixed setup cost. By creating a standardized set of just two or three label sizes that work across 80% of your product line, you can place larger, more cost-effective orders. This guide breaks down the hidden cost drivers in label production and provides a framework for smarter sourcing.
Deconstructing Your Jewelry Label's Unit Cost
The price you pay per label is not a simple calculation. It's a blend of fixed, one-time costs and variable, per-unit costs. When you order small quantities of many different sizes, the fixed costs are spread over fewer labels, making each one more expensive. Understanding this model is the first step to reducing your budget.
Our production floor, operating under strict ISO 9001:2015 quality management, relies on efficiency. Larger, standardized runs allow us to maximize that efficiency and pass the savings to you. Here’s a breakdown of how different factors influence your final landed cost, especially when ordering in bulk quantities over our 1,000-unit minimum for offset printing.
| Cost Factor | Impact on Small Run (e.g., 1,000 labels) | Impact on Large Run (e.g., 10,000 labels) | How to Optimize |
|---|---|---|---|
| Die-Cutting Plate Setup | High per-unit impact. A fixed setup cost (e.g., $80) is spread across only 1,000 units, adding $0.08 to each label. | Low per-unit impact. The same $80 setup cost is spread across 10,000 units, adding only $0.008 to each label. | Standardize your shapes. Using one die plate for multiple products dramatically lowers your average cost. |
| Printing Press Setup | High per-unit impact. Calibrating colors and aligning the press is a fixed labor cost, regardless of run size. | Negligible per-unit impact. The setup cost is absorbed by the high volume, making the per-label cost minimal. | Group orders for products that use the same color palette to reduce the number of press calibrations. |
| Material Waste | Higher percentage. The initial material used for machine setup and calibration represents a larger portion of a small total run. | Lower percentage. Setup waste becomes a tiny fraction of the overall material used in a large production run. | Choose standard label dimensions that fit efficiently on master rolls of substrate like BOPP or paper. |
| Labor & QC | Relatively high per unit. The time to manage, set up, and inspect a small job is disproportionate to the quantity produced. | Highly efficient. Labor costs per unit drop significantly as the production line runs continuously for a single job. | Consolidate your SKUs into fewer, larger orders to maximize production efficiency. |
The takeaway is clear: ordering 10,000 units of one standard-sized label is far more economical than ordering ten separate 1,000-unit batches of slightly different sizes.
Choosing Materials That Match Your Budget and Brand
The material, or substrate, you choose for your labels is a primary driver of both cost and customer perception. A flimsy paper label can make a high-quality piece of jewelry feel cheap, while a durable, elegant label reinforces its value. Your choice should balance aesthetics, function, and budget.
Here are the most common options for jewelry branding and their strategic applications:
- White BOPP (Biaxially Oriented Polypropylene): This is a versatile plastic-based film that is waterproof, oil-resistant, and tear-resistant. It's an excellent choice for premium product labels on rolls that need to withstand handling and shipping. It provides a smooth surface perfect for high-resolution printing.
- Kraft Paper: Ideal for brands with an artisanal, organic, or eco-conscious identity. Kraft labels offer a rustic, textured feel. While not inherently waterproof, they pair beautifully with minimalist designs and are often used for branding on boxes and bags.
- Clear BOPP: Creates a sophisticated "no-label" look, allowing the product's packaging or the jewelry itself to show through. This is popular for application on glass jars, clear pouches, or acrylic displays. A key challenge here is ensuring the white ink layer is sufficiently opaque, a common failure point we've engineered our printing process to solve.
- Metallic & Foil Substrates: For a true luxury feel, nothing beats the visual appeal of gold or silver foil. We recently produced a run of metallic custom foil jewelry labels for a natural health supplement brand in Australia, where a matte BOPP film was combined with scratch-proof lamination to create a standout shelf presence. This technique works exceptionally well for high-end jewelry branding.
Common Sizing Mistakes That Inflate Your Sourcing Budget
From my 12 years on the manufacturing floor, I've seen brands unintentionally add 20-30% to their labeling costs by making a few repeated mistakes. Avoiding these is low-hanging fruit for budget optimization.
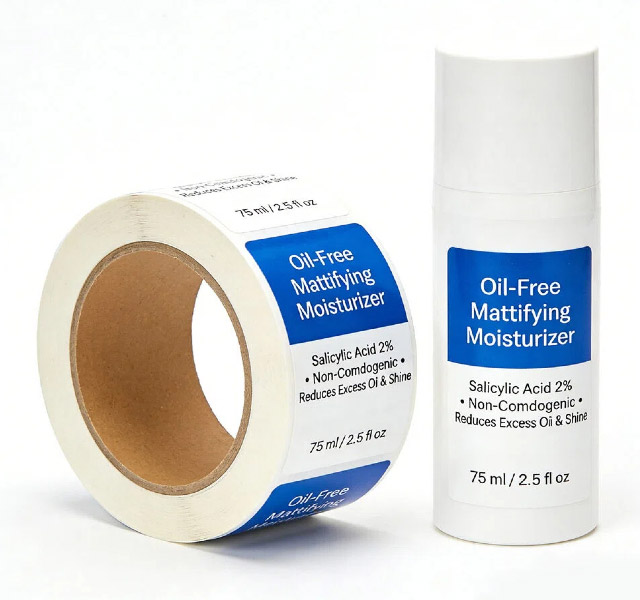
Before you send your next design file, check if you're making one of these common errors:
- The "One SKU, One Size" Fallacy: Creating a slightly different label dimension for your 1-inch, 1.5-inch, and 2-inch gift boxes. In most cases, a single well-designed 1.25-inch label would work perfectly on all three, allowing you to place one large, cost-effective order.
- Ignoring Safe Zones for Small Text: Jewelry labels are often small. Designers may place critical information like material type or your website URL too close to the edge. During die-cutting, even a fractional shift can crop this text. Always leave a generous internal margin.
- Choosing the Wrong Adhesive: A standard permanent adhesive might be perfect for a flat cardboard box but can fail on a curved surface like a small candle jar or a flexible velvet pouch. Specify the application surface to your supplier to ensure the adhesive is rated for it. This prevents labels from peeling or "flagging" at the edges.
- Overly Complex Die-Cut Shapes: An intricate, custom-shaped label looks unique but requires a complex and expensive die-cutting tool. A simple circle, oval, or rectangle can be just as effective and significantly cheaper to produce, especially if you use a common die size the manufacturer already has in stock.
Our team offers free design assistance to help you spot these issues before production begins, ensuring your final labels are both beautiful and manufacturable at a reasonable cost.
A Practical Framework for Consolidating Label Sizes
Ready to put this into practice? Consolidating your label inventory doesn't have to be a massive undertaking. It’s a simple auditing process that pays dividends on every future order. With our fast 3-day sample lead time, you can quickly test new standardized sizes on your packaging before committing to a bulk run.
Follow these steps to streamline your label strategy:
- Audit Your Current SKUs: Lay out every piece of packaging you use—earring cards, boxes, pouches, mailers, and jars. Group them by general size (small, medium, large).
- Identify "High-Frequency" Sizes: Look for opportunities. Do you have five different boxes that could all use the same 2" x 2" square label? Could all your earring and ring boxes use a single 1.5" circular sticker as a seal? The goal is to find the most versatile sizes.
- Design a "Universal" Label System: Create a design template for your new standardized sizes. This template should have your logo and brand elements in a fixed position, with a blank or variable space for product-specific details (like "14k Gold Hoops" or "Sterling Silver Necklace"). These details can be printed on demand or even hand-written for an artisanal touch.
- Standardize Across Product Tiers: You might settle on a system like this:
- Small Circle (1" Diameter): For sealing tissue paper, branding small ring boxes, or as a price tag dot.
- Medium Rectangle (2" x 1.5"): Your workhorse label for the majority of necklace and bracelet boxes.
- Large Rectangle (3" x 2"): For outer shipping boxes, large gift sets, or detailed custom jewelry box labels.
- Place a Consolidated Order: Instead of ten small orders, you now place one large order for three SKUs. Your per-unit cost drops, your inventory management is simplified, and your branding remains consistent. Plus, with every bulk order, we include 100 bonus pieces to give you even more value.
By shifting your focus from creating a unique label for every product to creating a smart, flexible system, you transform labeling from a recurring expense into a strategic, cost-controlled asset.
If you're ready to analyze your label needs and build a more efficient sourcing strategy, our team can help. Submit your current designs, and we can provide a consolidated quote that shows you the savings.