

Reduce Custom Patch Costs With Stitch Density Planning
A patch quote can look competitive until production starts and the supplier identifies dense fill areas, complex borders, or quantities that do not support the selected construction. Buyers often regret approving artwork without asking what is actually driving the unit price. For apparel brands, clubs, and event organizers, the main risk is paying for more embroidery than the design needs while still receiving borders that fray or details that blur.
Custom Patches should be quoted as a production specification, not only as a logo image. Stitch density, border type, backing, patch shape, and order volume all affect labor and material use. The best cost-control decision is rarely “use fewer colors.” It is usually selecting the right production method for the artwork and use case.
At Custom Panda, patches are supported by photo or digital sample confirmation before bulk production. Our facility is ISO 9001:2015 certified and Disney FAMA certified, with embroidery and metal production facilities operating across six production lines. That gives B2B buyers a clearer approval stage before committing a bulk budget.
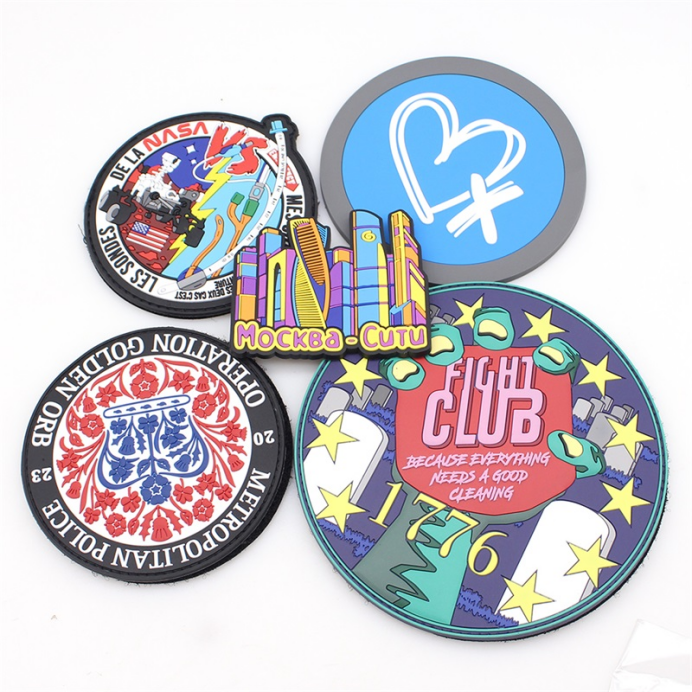
Match the Patch Construction to the Artwork
Conclusion: Use embroidered construction when thread texture is part of the intended look, but move tiny text, fine line art, and detailed gradients to woven or printed construction when embroidery would require excessive density. This protects both readability and quote efficiency.
Embroidery uses thread to build the design surface. Large filled areas and tightly packed details require more stitch work, which can increase production effort. It suits club emblems, uniform identifiers, sports designs, and bold logos with clear color blocks. It does not suit every file. A logo with tiny registration text or close parallel lines can become heavy, unclear, or expensive if forced into dense embroidery.
| Construction | Best fit | Cost planning advantage | Limit or unsuitable scenario |
|---|---|---|---|
| Embroidered patch | Bold logos, uniforms, club emblems, visible thread texture | Can simplify broad artwork into clean thread fields | Very small text and tightly packed art may require high stitch density |
| Woven patch | Fine text, detailed line work, small brand marks | Can reduce the need to force fine details into dense thread fills | Does not provide the raised texture expected from embroidery |
| Heat transfer patch | Photo based art, gradients, detailed color transitions | Avoids embroidery labor for image-led designs | Not the right choice when a traditional embroidered appearance is required |
| PVC soft rubber patch | Outdoor gear, tactical items, designs needing molded relief | Separates molded detail from embroidery stitch planning | Does not suit a soft textile appearance |
| Chenille patch | Letterman apparel, varsity letters, oversized collegiate graphics | Uses plush visual impact instead of dense logo fill | Fine detail is not its strength |
For example, a university sports team seeking large letters for heavy wool jackets should consider chenille rather than a densely embroidered full-fill design. Custom Panda supplied chenille letterman jacket patches to a Swedish university sports team using plush felt backings and high-density stitching. That approach suited a large, highly visible application. It would not be the right format for a small chest logo with narrow lettering.
For clothing programs that also need neck tags or care information, pair the patch specification with custom woven clothing labels. Keep the patch focused on external identification and the garment label focused on wearer information. Combining both functions into one small embroidered emblem often creates unnecessary detail pressure.
Cost: a quote comparison method showing how stitch density, border type, and order volume change unit cost
Conclusion: Ask every supplier to quote the same artwork in two or three defined construction options. Compare confirmed costs only after separating them from estimates and open variables. This makes it possible to see whether the lower quote reflects less stitch work, a different border, a higher quantity, or an excluded service.
Do not compare a single unit price without the specification behind it. A lower price can be valid, but it may relate to a lower stitch count, a simpler edge finish, or a larger production run. The following method gives procurement teams a consistent basis for review.
| Quote factor | How it can change unit cost | What to request from suppliers | Cost status before quotation |
|---|---|---|---|
| Embroidery stitch density | More filled thread areas and fine detail can increase production work | State whether full fill, partial fill, or simplified fill is required | Unknown until artwork is reviewed |
| Border type | Merrowed edge and laser cut edge may require different production steps | Request one quote for each border that suits the shape | Unknown until shape and size are confirmed |
| Patch order volume | Larger quantities can spread setup and preparation across more units | Request price breaks at planned order levels | Estimated until supplier quotes each quantity |
| Backing choice | Sew on, heat seal, or hook and loop backing can affect materials and assembly | List the required backing and application surface | Unknown until backing is selected |
| Artwork revision | Simplifying small details may reduce the embroidery requirement | Request a revised production proof with changes clearly marked | Confirmed only after proof approval |
Use three cost categories during quote review
- Confirmed costs: The supplier’s written price for a defined size, quantity, border, backing, and approved artwork. Treat this as comparable only when every quote covers the same scope.
- Estimated costs: Internal planning figures based on a proposed density level, volume range, or expected border style. These are useful for budget approval but should not be presented as a supplier commitment.
- Unknown costs: Changes caused by unreviewed artwork, an unspecified backing, unconfirmed delivery destination, or an unclear quantity split. Resolve these before issuing a purchase order.
Use a quote request with the same fields for every vendor: finished patch size, shape, embroidery coverage, border, backing, required quantity, intended use, and delivery location. Then ask for options such as 100, 500, and 1,000 units if those quantities are realistic for your program. Standard bulk items may have a 1,000-unit minimum for offset printing, while select custom items can have no MOQ. Do not assume that policy applies identically to every patch construction; request the relevant quote.
Order volume is especially important when a club expects repeat demand. A first order sized only for the launch event may create a higher unit cost than a planned seasonal requirement. However, ordering more solely to chase a lower unit price does not apply when designs are likely to change, membership counts are uncertain, or storage is limited.
Choose Borders That Protect Both Appearance and Budget
Conclusion: Select a merrowed border for simple shapes that benefit from a raised thread edge. Select a laser cut border when the outline has corners, internal angles, or a custom silhouette that a wrapped thread edge cannot follow neatly. The lower-cost option is not automatically the better one if it makes the finished edge look unsuitable for the artwork.
Merrowed patch borders work well on circles, ovals, rectangles, shields, and other smooth outlines. The edge is visible and traditional. It fits uniforms, team emblems, and heritage-style logos. Its limit is geometry: sharp points, narrow notches, and irregular contours can look compromised if a merrowed edge is forced around them.
Laser cut borders follow complex shapes more closely. They suit logos with angled edges, mascots, custom silhouettes, and shapes that would lose definition under a broad thread border. The limit is visual preference. A laser cut finish may not offer the same framed look desired for a classic service patch.
- Choose merrowed patch borders for standard shapes, bold emblems, and a clearly framed thread edge.
- Choose laser cut borders for irregular outlines, sharp corners, or detailed logo silhouettes.
- Avoid an unspecified border because suppliers may quote different edge treatments, making the results difficult to compare.
- Do not use a complex outline only for decoration if a standard shape would retain the brand recognition. A simpler shape can reduce production complexity without changing the core logo.
For outdoor programs, border selection must work with the attachment method. Custom Panda produced heavy-duty embroidered Velcro patches for a United States outdoor gear brand, using weather-resistant threads and hook-and-loop backings for hiking backpacks and tactical vests. That solution fits removable gear identification. It does not replace a permanently sewn patch on a fashion garment, where hook-and-loop bulk may be unwanted.
Buyers sourcing removable identifiers can review custom hook and loop patches when the patch needs to move between gear, uniforms, or event roles. Confirm whether the order requires the hook side, loop side, or both components. Leaving that detail open prevents an accurate comparison.
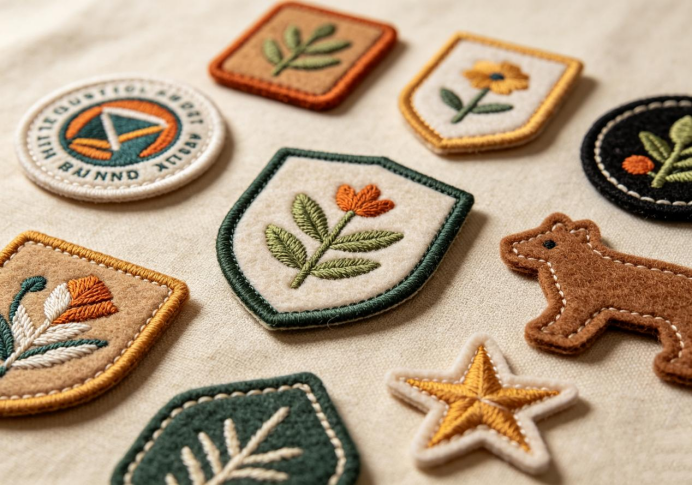
Reduce Density Without Making the Logo Look Cheap
Conclusion: Simplify only the elements a viewer will not distinguish at the finished patch size. Preserve the recognizable silhouette, primary color areas, and major type hierarchy. This fits logos being adapted from digital files to textile production; it does not apply when an approval standard requires an exact, unchanged insignia.
Dense embroidery is often created by artwork that was designed for screens or print. Fine gradients, shadows, small copy, and layered textures may all be meaningful on a website but unreadable on a small fabric patch. The correct response is not merely reducing stitch density. It is redesigning the patch artwork for its actual viewing distance and finished size.
Follow this artwork review procedure
- Set the intended patch size first. Do not approve details before deciding whether the item will be used on a cap, sleeve, chest, backpack, or jacket.
- Identify recognition elements. Mark the logo silhouette, main wordmark, mascot outline, or key icon that must remain unchanged.
- Remove microtext where it cannot be read. Replace it with a larger initial, date, or abbreviated identifier only if the brand owner approves.
- Convert gradients into clear color zones. This is suitable when the design still reads with distinct blocks; it is unsuitable for artwork where photographic shading is mandatory.
- Review fill areas. Ask whether a large background can become an open base fabric area, partial fill, or a separate border rather than full thread coverage.
- Approve a digital or photo sample. Check text, border shape, thread colors, backing position, and overall balance before bulk production.
Fine embroidery, woven labels, heat transfer, PVC soft rubber, chenille, Velcro backing, and heat-seal iron-on backing are available options at Custom Panda. The right selection depends on the logo and application, not a generic preference for “premium” construction. A luxury apparel label with fine lettering may need a woven format, while a hiking club badge may need embroidered texture and removable backing.
For garments where direct application is preferred, compare custom iron on patches with sew-on construction before finalizing the quote. Heat seal can suit controlled application programs. It may not be suitable where the final fabric, laundering conditions, or application equipment have not been confirmed.
Prevent Quote Surprises Before Bulk Approval
Conclusion: A complete purchase specification prevents the most expensive type of cost issue: rework after production begins. Use it when buying for multiple garment styles, locations, or event teams. It is less necessary for a single ready-stock item, but it remains useful whenever custom artwork is involved.
| Buyer check | Why it matters | Decision to make |
|---|---|---|
| Final artwork file | Unapproved changes can alter density and visual detail | Confirm the exact file version for production |
| Finished size | Size affects detail readability and embroidery coverage | State width or height and where the patch will be used |
| Border specification | Border style changes appearance and production method | Select merrowed or laser cut edge |
| Backing specification | Attachment method affects use and material requirement | Select sew on, heat seal, or hook and loop backing |
| Quantity breaks | Unit cost can change with volume | Request quotations at realistic order levels |
| Sample approval | Confirms the production interpretation before bulk work | Approve digital or photo sample in writing |
| Defect process | Sets expectations if goods do not meet approved requirements | Confirm remedy terms before placing the order |
Custom Panda offers color mismatch free reprint, proportional replacement for defects, 5-day fast re-stocking or repair, and 100 bonus pieces with every bulk order. These are production support terms, not a substitute for clear artwork approval. The strongest control remains a complete specification and a confirmed sample.
Our stated sample lead time for pins, patches, and labels is 3 days, while bulk production is listed at 8–9 days. U.S. shipping is listed at 5–6 business days. Buyers should still validate the applicable schedule for their construction, quantity, approval timing, and destination before committing to an event date.
Request a quote with your artwork, finished size, border preference, backing choice, and quantity options to compare the true cost of your patch program.