


What Are Custom Leather Patches?
Custom leather patches are patches made from genuine leather (full-grain, top-grain, or bonded leather) that have been debossed, embossed, or laser-engraved with a logo, text, or design. Unlike fabric patches, leather patches offer a rugged, natural, and premium aesthetic that improves with age. Over time, leather develops a unique patina—a slight darkening and softening that adds character and a vintage feel.
These patches are most commonly associated with denim jeans (back patch), caps (front or side), workwear jackets, leather bags, and outdoor gear. They convey durability, heritage, and craftsmanship. While leather patches are not as colorful or detailed as embroidered or printed patches, their tactile warmth and timeless appeal make them a favorite for brands seeking a classic, rugged look.
Leather patches can be made from different grades of leather, including genuine leather (most common), bonded leather (reconstituted leather fibers), or synthetic leather (PU or PVC-based, vegan-friendly). Each has different cost and durability characteristics.
Key Features of Custom Leather Patches
Custom leather patches offer a unique set of features that set them apart from fabric or synthetic patches:
Natural, Premium Aesthetic – Leather has a warmth, grain texture, and organic beauty that synthetic materials cannot replicate.
Develops Patina Over Time – Unlike printed patches that fade, leather ages gracefully, becoming softer and richer in color with use and exposure.
Debossed or Embossed Design – Logos and text are pressed into the leather (debossed, sunken) or raised from the surface (embossed), creating a subtle three-dimensional effect.
Laser-Engraving Capability – High-precision laser engraving can burn fine details, small text, and even photographs into the leather surface.
Durable & Long-Lasting – Good quality leather patches can last for decades, outlasting the garment they are attached to.
Available in Multiple Leather Types – Choose from full-grain (highest quality, shows natural marks), top-grain (sanded and uniform), genuine (split leather with coating), bonded (reconstituted), or vegan leather (synthetic).
Color Options – Natural tan, brown, black, dark brown, and limited dyed colors. Leather does not offer the unlimited color palette of printed patches, but natural earth tones are its strength.
Most Popular Leather Patch Styles
Among custom leather patches, the following styles are the most popular:
Debossed Leather Patches – The design is pressed down into the leather surface, creating a sunken impression. This is the most common and classic style. The recessed area may be left natural or heat-stamped with foil (gold, silver, copper).
Embossed Leather Patches – The design is raised above the surrounding leather surface. Less common than debossing because it requires more precise tooling and works best on thicker leather.
Laser-Engraved Leather Patches – A laser burns away the top surface of the leather, creating a dark, precise mark. Excellent for fine details, small text, and photographic-style line art. No physical die required, so setup costs are low.
Foil-Stamped Leather Patches – After debossing, a heated foil (gold, silver, copper, black, white) is applied to the recessed area, creating a metallic or bright contrast against the natural leather.
Printed Leather Patches – Ink is screen printed or pad printed onto a smooth leather surface. Less common because the ink sits on top and may wear over time. Best for low-wear applications like hat fronts.
Woven Label on Leather – A fabric woven label is sewn or glued onto a leather backing piece, combining the detail of weaving with the premium look of leather.
Custom Leather Patches: Pros and Cons
Understanding the trade-offs between leather patches and other patch types will help you make the right choice.
| Pros (Advantages) | Cons (Disadvantages) |
|---|---|
| Timeless, Premium Aesthetic – Leather conveys quality, heritage, and craftsmanship that synthetic patches cannot match. | No Full Color or Gradients – Leather patches are limited to the natural color of the leather plus foil accents. You cannot print photographs or complex multi-color logos. |
| Develops Character with Age – Unlike other patches that look worn out, leather looks better with age, developing a unique patina. | Higher Cost – Genuine leather patches are more expensive than embroidered, woven, or printed patches, especially for small quantities. |
| Very Durable – High-quality leather patches can last for decades and resist tearing, fraying, and general wear. | Natural Variation – Leather is a natural material. Color and grain can vary between batches and even within the same patch. This is a feature for some, a drawback for others. |
| Subtle, Understated Look – Debossed or embossed logos are elegant and not "loud." Ideal for premium brands that want a quiet brand mark. | Not Machine Washable – Leather patches should not be machine washed or dried. Hand wash or spot clean only. The garment must be washed carefully. |
| Laser Engraving Offers Fine Detail – For detailed text or line art, laser engraving achieves precision that debossing cannot. | Limited Color Palette – Available leather colors are mostly earth tones: tan, brown, black, dark brown, and occasional red or blue. Bright colors are not possible. |
| Eco-Friendly & Biodegradable (Genuine Leather) – Leather is a natural byproduct of the food industry. Unlike synthetic patches, it will biodegrade. | Thicker Than Fabric Patches – Leather patches are typically 1.2mm–2.5mm thick, which adds noticeable bulk compared to thin woven or printed patches. |
Summary: Choose custom leather patches when you want a premium, rugged, timeless look for denim, caps, bags, or outdoor gear, and your design is simple (logo, text, monogram) without needing full color. Choose embroidered or printed patches when you need full color, complex artwork, or washable applications.
What Are Custom Leather Patches Commonly Used For?
Custom leather patches have strong traditional associations but have expanded into many areas:
Denim Jeans (Back Patch) – The classic application. A leather patch on the back waistband of jeans is a signature detail of premium denim brands.
Caps & Hats – Front-center or side leather patches on baseball caps, trucker hats, and dad caps. Very popular in streetwear and outdoor brands.
Workwear & Jackets – Brand patches on chore coats, canvas jackets, and leather moto jackets. Adds a rugged, utilitarian feel.
Bags & Accessories – Leather patches on backpacks, tote bags, messenger bags, and wallets. Serves as both branding and a decorative element.
Outdoor & Heritage Brands – Hunting, fishing, camping, and workwear brands use leather patches to convey durability and connection to nature.
Corporate & Gift – Premium corporate gifts, anniversary patches for leather goods, and brand patches for leather-bound journals or portfolios.
Pet Accessories – Leather patches on dog collars, harnesses, and leashes. Laser-engraved with the pet's name and owner's phone number.
How to Design Leather Patches That Get Noticed
Designing for leather is different from designing for fabric or print. Leather has texture, thickness, and natural variation. Follow these guidelines:
Design Guidelines:
Keep designs simple and bold – Leather debossing works best with chunky text, simple logos, and clear outlines. Intricate details may not press clearly.
Avoid small text – Minimum text height for debossing: 3–4mm. For laser engraving, text can be smaller (2–3mm), but very fine letters may become hard to read on textured leather.
Use vector files – AI, PDF, CDR, or SVG formats are essential. Debossing and laser engraving require clean vector paths.
Design for single-color – Leather patches are essentially single-color (the leather itself) plus optional foil accents. Do not design with multiple colored areas.
Consider the leather color – Natural tan shows debossing well. Dark brown and black show debossing less clearly but look more rugged. Foil stamping (gold, silver) creates contrast on dark leather.
Leave a border – A solid margin around the design prevents the debossed area from running too close to the patch edge, which can cause tearing.
Understand shape limitations – Leather patches are typically cut into simple shapes: rectangle with cut corners, oval, circle, or shield. Very intricate die-cut shapes are possible but more expensive and prone to tearing.
Border Options to Consider:
Straight Cut Edge – The patch is cut straight through the leather with no finishing. Most common. The natural leather edge is visible. May darken with age.
Skived (Beveled) Edge – The edge is cut at an angle, creating a tapered, thinner profile. Looks more refined and premium. Common on high-end denim patches.
Stitched Border – A line of stitching (contrast or matching thread) runs around the edge of the patch. Adds a crafted, handmade look. Also helps prevent edge curling.
Painted Edge – The cut edge is painted with matching or contrasting edge paint. Common on high-end leather goods (bags, wallets). Rare on patches but available.
Heat-Sealed Edge – For synthetic or bonded leather, the edge can be heat-sealed to prevent fraying or delamination.
For most leather patches, the straight cut edge is standard and perfectly adequate. Stitched borders are the most popular "upgrade" for a premium look.
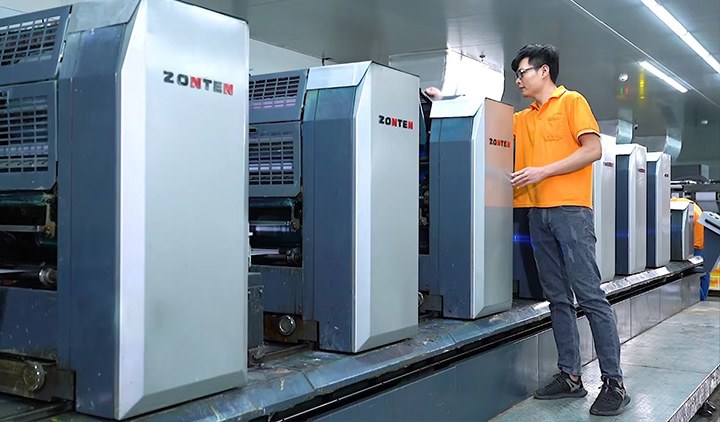
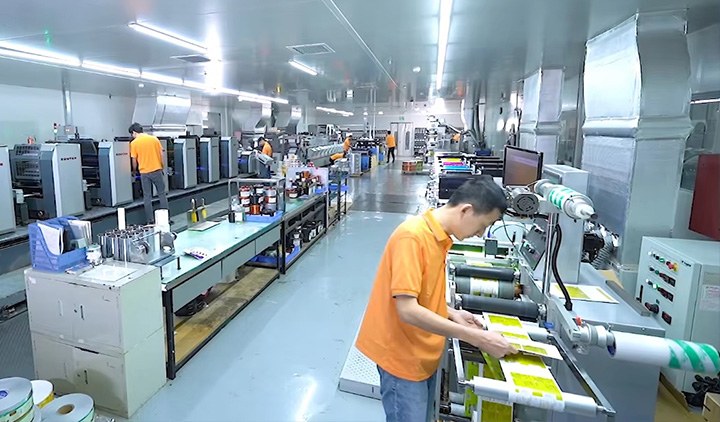
How Custom Leather Patches Are Made
The manufacturing process depends on the technique (debossing, embossing, laser engraving). Here is the typical workflow for debossed leather patches:
Leather Selection – The appropriate leather type (full-grain, top-grain, genuine, or bonded) and color are selected. Leather comes in hides or sheets.
Die Creation (for Debossing/Embossing) – A brass or magnesium die is created from your vector artwork. The die has raised areas (for debossing) or recessed areas (for embossing). This is the main tooling cost.
Cutting Leather Blanks – The leather sheet is cut into individual patch blanks, typically using a steel-rule die or laser cutter. Blanks are slightly larger than the final patch size if edge stitching will be added.
Debossing or Embossing – The leather blank is placed in a heat press. The heated die is pressed into the leather under high pressure, permanently compressing the leather fibers to create the sunken (debossed) or raised (embossed) design.
Foil Stamping (Optional) – If foil accents are requested, a heated foil die presses colored foil onto the debossed areas. The foil adheres only to the compressed leather.
Laser Engraving (Alternative Process) – Instead of a physical die, a laser beam is used to burn the design into the leather surface. This is slower per patch but has no die cost, making it ideal for small batches or highly detailed designs.
Edge Finishing – Patch edges are trimmed, beveled, stitched, or painted as required.
Quality Inspection – Each patch is checked for clarity of impression, foil adhesion (if used), edge quality, and surface defects (scratches, brands, inconsistent grain).
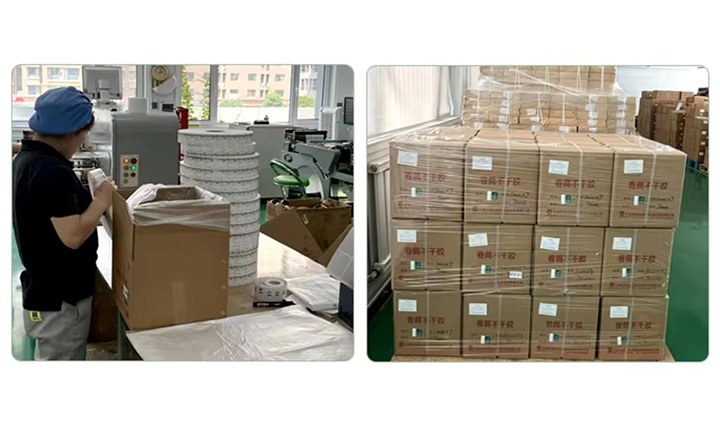
Packaging – Finished patches are carefully stacked with tissue paper between layers to prevent scratching or marking.
Price of Custom Leather Patches
The pricing of custom leather patches is different from fabric patches because raw material (leather) and tooling (dies) dominate the cost.
Comparison with Embroidered Patches: For small quantities (under 250 pieces), leather patches are generally more expensive than embroidered patches due to die costs and higher material cost. For large quantities (1,000+ pieces), the per-piece gap narrows because the die cost is amortized.
Comparison with Printed or Woven Patches: Leather patches are almost always significantly more expensive than printed or woven patches. You pay a premium for the material and the aesthetic.
Key Price Factors:
Leather type – Bonded leather is cheapest. Genuine leather is mid-range. Top-grain and full-grain are most expensive.
Die cost – A brass die for debossing costs money upfront. This is a one-time fee. Laser engraving has no die cost but higher per-piece time.
Size – Larger patches use more leather and require larger dies.
Quantity – Unit price drops significantly as quantity increases because the die cost is spread over more pieces.
Edge finishing – Straight cut is cheapest. Stitched borders or skived edges add cost.
Foil stamping – Adds a per-piece cost for the foil material and additional press time.
A General Price Indication: For a typical 2.5 x 1.5 inch debossed genuine leather patch with straight cut edges, at medium quantities (250–500 pieces), the price per patch is roughly equivalent to a fast-food meal. For small batches (50–100 pieces), laser engraving (no die) is often more economical than debossing (requires die). Compared to an embroidered patch of the same size, expect to pay 50–100% more for genuine leather.
How to Get an Accurate Quote: Send the following to any reputable leather patch manufacturer:
Your design file (vector format: AI, PDF, CDR)
Desired size (e.g., 2.5 x 1.5 inches)
Target quantity (e.g., 200 pieces, 1,000 pieces)
Leather type (genuine, bonded, vegan, etc.) and color
Process (debossing, laser engraving, or foil stamping)
Edge finish (straight cut, stitched, skived)
How to Customize Custom Leather Patches for Your Project
Ready to create your own leather patches? Follow these steps:
Prepare Your Artwork – Simplify your design. Use bold, chunky shapes and avoid very small text. Vector files only (AI, PDF, CDR, SVG). No gradients or multiple colors.
Choose Your Leather – Select type (genuine, bonded, or vegan) and color (tan, brown, black, dark brown). Order a leather swatch first to see and feel the material.
Choose Your Process – Debossing (classic, requires die), laser engraving (no die, good for small batches and fine detail), or foil stamping (adds metallic color).
Decide on Shape & Edge – Standard shape (rectangle, circle, oval) or custom die-cut? Straight edge or stitched border?
Request Quotes – Send your artwork and specifications to 2–3 leather patch specialists (not all patch makers work with leather).
Order a Sample – Leather varies more than fabric. Always order a physical sample to confirm leather color, grain texture, impression depth, and edge finish.
Approve & Place Bulk Order – Once the sample meets your expectations, approve it and place your order. Typical production: 10–18 business days (leather may take longer than fabric patches).
Plan Packaging – Leather patches scratch easily. Discuss protective packaging (tissue paper interleaving) with your manufacturer.
Packaging Options for Custom Leather Patches
Leather patches require more careful packaging than fabric patches because they can scratch, mark, or dry out.
Tissue Paper Interleaving – Each layer of patches is separated by acid-free tissue paper. Standard for bulk orders. Prevents scratching and absorbs moisture.
Individual Poly Bags – Each patch is placed in a separate clear poly bag. Provides excellent protection. Ideal for smaller quantities or retail distribution.
Backing Cards – Patches are attached to cards (similar to pin backing cards). The card protects the front and back. Often sealed in a clear sleeve.
Cotton or Felt Pouches – Premium packaging for high-end patches. Each patch is placed in a soft cotton or felt pouch. Suitable for luxury brands or gift sets.
Flat Cartons with Dividers – For large quantities of larger patches, rigid cartons with cardboard dividers prevent patches from touching each other.
